 By Saurav Mehra
 A motorcycle chain does not get the attention it deserves. Most riders remember petrol, engine oil, tyre pressure and washing the bike, but the chain keeps working quietly every day—pulling the rear wheel through traffic, potholes, flyovers, rainwater, dust, mud and long highway rides. In India, where roads can change from smooth tarmac to broken patches within minutes, the chain faces heat, dirt, water and friction constantly.
A dry or dirty chain can make your bike feel rough, noisy and less responsive. It can reduce mileage, damage sprockets, create jerky acceleration and even become a safety risk if ignored for too long. Many riders visit a mechanic only when the chain starts making loud noise or becomes loose, but basic chain cleaning and lubrication can easily be done at home.
The best part is that you do not need expensive tools or expert-level mechanical knowledge. With a chain cleaner, chain lube, brush, cloth and a little patience, you can keep your motorcycle chain smooth and healthy. Whether you ride a commuter bike, sports bike, cruiser, touring bike or daily office motorcycle, learning this simple maintenance habit can save money and improve riding comfort.
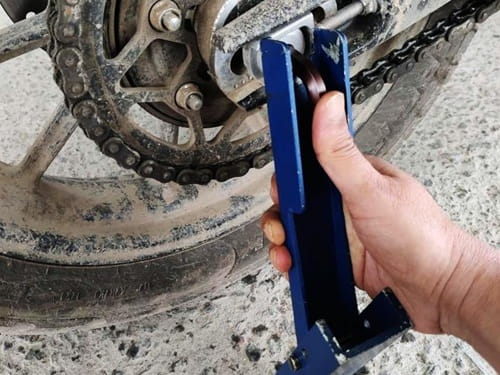
Why Motorcycle Chain Cleaning Is Important
Your motorcycle chain transfers power from the engine to the rear wheel. Every time you accelerate, the chain and sprockets handle load, movement and friction. If the chain is clean and lubricated, this power transfer feels smooth. If it is dry, dirty or rusty, the bike can feel heavy and noisy.
Dust and mud stick to old chain lube. This creates a grinding paste that slowly wears the chain and sprocket teeth. In monsoon, water washes away lubrication and increases rust risk. In summer, heat and dust make the chain dry faster.
Regular cleaning removes dirt. Lubrication reduces friction. Together, they increase chain life and make your ride smoother.
How Often Should You Clean and Lube the Chain?
There is no single fixed interval for every bike because riding conditions matter. For normal city use, cleaning and lubing the chain every 500–700 km is a practical habit. If you ride in heavy rain, muddy roads, dusty areas or long highways, do it sooner.
After a rain ride, water wash, off-road ride or very dusty trip, inspect the chain. If it looks dry, noisy or muddy, clean and lube it.
Some riders apply lube without cleaning every time. This is okay only if the chain is not very dirty. If dirt has already built up, adding more lube on top of grime will make the chain sticky and messy.
Tools You Need at Home
You do not need a full workshop setup. Keep a few basic items ready: motorcycle chain cleaner or kerosene, motorcycle chain lube, chain cleaning brush or old toothbrush, microfiber cloth or cotton rag, gloves, cardboard or newspaper, and a paddock stand or main stand if available.
If your bike has a main stand, the job becomes easier because the rear wheel can rotate freely. If your bike has only a side stand, you can still clean the chain section by section by moving the bike slightly forward.
Avoid using petrol as a chain cleaner. It is highly flammable and can damage rubber seals. Also avoid harsh household detergents, strong acids or random solvents.
Know Your Chain Type
Many modern motorcycles use O-ring, X-ring or sealed chains. These chains have small rubber seals that hold grease inside the chain links. They need gentle cleaning and proper lube.
Using harsh chemicals can damage these rubber rings. Once the seals are damaged, internal lubrication can escape and chain life reduces.
Older or basic bikes may have non-sealed chains. They still need cleaning and lubrication, but sealed-chain care needs extra caution.
If you are not sure about your chain type, check your owner’s manual or ask your service centre.
Step 1: Park the Bike Safely
Park the bike on flat ground. Switch off the engine and remove the key. Never clean the chain with the engine running. This is extremely dangerous because fingers, cloth or brush can get pulled into the chain and sprocket.
Use the main stand or paddock stand if available. If not, park on side stand and clean the visible chain section first. Then move the bike slightly forward to access the next section.
Make sure the exhaust is not burning hot. A slightly warm chain after a short ride can help cleaning, but do not work near a very hot exhaust or engine.
Step 2: Inspect the Chain Before Cleaning
Before spraying anything, look at the chain carefully. Check for rust, tight spots, broken links, missing O-rings, excessive slack, damaged sprocket teeth and uneven movement.
Also check whether the chain is too loose or too tight. If the chain has tight and loose sections, it may be worn. If sprocket teeth look sharp, hooked or bent, replacement may be needed.
Cleaning and lubing will not fix a badly worn chain. It will only help a healthy chain last longer.
Step 3: Protect the Area
Place cardboard, newspaper or an old cloth under the chain area. Chain cleaner and dirty lube can drip onto the floor. If you live in an apartment parking area, this step keeps the place clean.
Also protect the rear tyre and brake disc from overspray. Chain lube on tyres can reduce grip. Lube on brake disc can reduce braking performance.
Spray carefully and wipe excess immediately if it falls on unwanted areas.
Step 4: Apply Chain Cleaner
Spray motorcycle chain cleaner on the chain while rotating the rear wheel slowly by hand. Cover all sides of the chain—outer plates, inner plates and rollers.
If you are using kerosene, apply it with a brush or cloth. Use only a small amount and keep it away from brakes, tyres and painted surfaces.
Let the cleaner sit for a short time so it can loosen dirt and old grease. Do not let strong cleaner dry completely on the chain.
Step 5: Scrub the Chain Gently
Use a chain cleaning brush or old toothbrush to scrub the chain. Focus on the rollers and side plates where dirt collects. Rotate the wheel by hand and clean one section at a time.
Do not use a hard wire brush on sealed chains. It can damage O-rings and scratch the metal surface. Gentle but thorough cleaning is better.
If the chain is very dirty, repeat the cleaner and brushing process. Do not rush. A clean chain accepts lube better and runs smoother.
Step 6: Wipe and Dry the Chain
After cleaning, wipe the chain with a dry cloth. Remove loosened dirt, cleaner residue and old lube. Rotate the wheel and wipe all sections.
The chain should be dry before lubrication. If lube is applied on a wet chain, it may not stick properly and can fling off quickly.
Give the chain a few minutes to dry naturally if needed. Do not use high-pressure air too close to sealed chains because it may push dirt or moisture into sensitive areas.
Step 7: Apply Chain Lube Correctly
Apply motorcycle-specific chain lube to the inside run of the chain, not only the outside visible surface. The inside run is the part that contacts the sprocket teeth during movement.
Rotate the wheel slowly by hand and spray a thin, even layer. Do not flood the chain. Excess lube attracts dust and creates a messy black paste.
After applying, let the lube settle for 10–20 minutes if possible. Many riders prefer lubing after a ride and letting the bike rest, so the lube can penetrate and stick better.
Step 8: Wipe Excess Lube
After the lube settles, gently wipe extra lube from the outer plates. The chain needs lubrication at the rollers and contact points, not thick sticky coating everywhere.
Excess lube will fling onto the wheel, swingarm, saree guard, number plate and rear tyre. It also attracts dirt faster.
A clean, lightly lubricated chain is better than a thick, greasy chain.
Step 9: Check Chain Slack
After cleaning and lubing, check chain slack. Every motorcycle has a recommended slack range mentioned in the owner’s manual. Too loose or too tight both are bad.
A loose chain can make noise, jerk during acceleration and may slip in extreme cases. A tight chain can damage bearings, sprockets and gearbox output shaft.
If adjustment is needed, get it done properly. If you are not confident, visit a mechanic. Wrong chain adjustment can create bigger problems.
Common Mistakes to Avoid
Do not clean the chain with the engine running. Do not use petrol for cleaning. Do not spray lube on the tyre or brake disc. Do not over-lubricate. Do not use a wire brush on sealed chains. Do not ignore chain slack. Do not apply lube on a muddy chain and call it maintenance.
Another common mistake is pressure washing the chain closely. High-pressure water can push dirt and moisture into chain seals. Use gentle cleaning instead.
Best Time to Lube the Chain
The best time to lube the chain is after a ride when the chain is slightly warm, not burning hot. Warm chain surfaces help the lube spread better.
If you clean the chain first, dry it properly, apply lube, and then leave the bike parked for some time, the result is better. Avoid lubing and immediately riding fast because fresh lube may fling off.
For daily commuters, evening chain care after returning home is practical.
Chain Care During Monsoon
Monsoon is tough on chains. Rainwater washes away lube, and muddy water carries dirt into the chain area. After riding in heavy rain, check the chain once the bike is parked safely.
If it looks dry or dirty, wipe it and apply lube. If mud has collected, clean it properly before lubing.
During rainy months, chain maintenance frequency should increase. A neglected chain can rust quickly in humid weather.
Chain Care During Summer and Dusty Conditions
In summer, dust sticks to old lube and forms a rough layer. Riders in dry cities, construction-heavy areas or rural roads should clean the chain more often.
Do not keep adding lube without cleaning. This creates a sticky dust layer that increases wear. A light but regular cleaning routine works better.
If you ride on highways in hot weather, inspect the chain after long trips because heat and speed can dry it faster.
Can You Use Engine Oil Instead of Chain Lube?
Some riders use gear oil or engine oil because it is cheap and easily available. While it can provide lubrication, it may fling off quickly and make the wheel messy. It can also attract dust faster.
Motorcycle chain lube is designed to stick better and protect the chain under riding conditions. For regular home maintenance, a proper chain lube spray is more convenient and cleaner.
If your owner’s manual recommends a specific lubricant type, follow that guidance.
When Should You Replace the Chain?
Cleaning and lubing cannot save a chain forever. Replace the chain if it has excessive slack even after adjustment, tight spots, rust damage, broken links, missing seals, heavy noise or uneven movement.
Also check sprockets. If sprocket teeth are sharp, hooked or worn, replace chain and sprockets as a set. A new chain on badly worn sprockets will wear quickly.
If the chain jumps, makes loud clanking noise or feels unsafe, do not delay inspection.
Simple Home Chain Maintenance Routine
Every few weeks, inspect the chain. If it is lightly dry, wipe and lube it. If it is dirty, clean first, dry properly and then lube. Check slack regularly. After rain, mud or long rides, inspect sooner. Use the right products and avoid shortcuts.
This routine takes little time but makes your motorcycle smoother, quieter and safer.
FAQs
Q1. How often should I clean and lube my motorcycle chain?
For normal city riding, clean and lube the chain every 500–700 km. If you ride in rain, mud, dust or long highway conditions, inspect and lubricate it sooner.
Q2. Can I clean my bike chain with petrol?
No, petrol is unsafe because it is highly flammable and can damage rubber seals in modern chains. Use motorcycle chain cleaner, kerosene carefully, or a cleaner recommended for your chain type.
Q3. Should I lube the chain before or after a ride?
Lubing after a ride is usually better because the chain is slightly warm and the bike can rest afterward, allowing the lube to settle. Avoid riding immediately after heavy lubrication.
Q4. Why does chain lube fly onto my rear wheel?
This usually happens when too much lube is applied or the bike is ridden immediately after lubing. Apply a thin layer, let it settle, and wipe excess from the chain.